> ## Documentation Index
> Fetch the complete documentation index at: https://developer.tryfinch.com/llms.txt
> Use this file to discover all available pages before exploring further.
# Manage Connections
> In this guide, you’ll learn how to define and manage multi-account, multi-provider, and multi-entity connections based on your customers’ needs.
Every [access token obtained](/implementation-guide/Connect/Retrieve-Access-Token) is associated with a connection. Therefore, to prevent mixing up data across different users or employers, it is important to make sure you associate each access token with the correct connections in your application. Implementing a system to track the relationship between your customers and their corresponding access tokens is recommended.
## Define connections
Finch defines a connection using a `connection_id`. A connection exists once an access token is obtained.
There are a couple scenarios to keep in mind when thinking about connections:
1. **Multi-Provider**
Employers may be using multiple payroll systems to manage employees within their company. For example, an employer may use Payroll Provider A to manage foreign contractors, and Payroll Provider B to manage US-based employees. The employer can only connect one provider in one Finch Connect session; a connection is created for each connected provider. Even though the employer is connecting the same company, Finch will create multiple connections because the underlying `provider_id` is different for each connection.
2. **Multi-Entity**
An employer’s payroll system may consist of one or many entities. An entity is a grouping of employees within a payroll system (e.g.: divisions, EINs). Employers have the ability to select one or multiple entities to connect at once. If an employer selects multiple entities, Finch will create a single connection with one `connection_id` and access token.
## Isolate connections
Given these scenarios, your application must be able to manage multiple connections per customer and keep each connection and its corresponding access tokens isolated from the rest.
You should store access tokens in your system using the `connection_id`.
* `provider_id` = the payroll provider associated with the access token.
* `customer_id` = a unique identifier that you create to manage your customers internally
> You define the `customer_id`; Finch defines the `connection_id` (more on this below).
### Introspect endpoint
The best way to retrieve the unique ids associated with an access token is by calling the [Introspect](/api-reference/management/introspect) endpoint. It will return a JSON body containing account information associated with the `access_token`.
```json Example /introspect response theme={null}
{
"account_id": "d8ef1814-5913-492f-b5c0-a16e2d6432c9",
"client_id": "25ea8bd8-f76b-41f9-96e3-1e6162021c50",
"connection_id": "6dab009c-77c8-43d9-8f81-e093f7c65bc1",
"company_id": "87eb4bc3-f76b-35e7-78d2-8f7822021d73",
"payroll_provider_id": "gusto",
"products": [...],
...
}
```
### Example
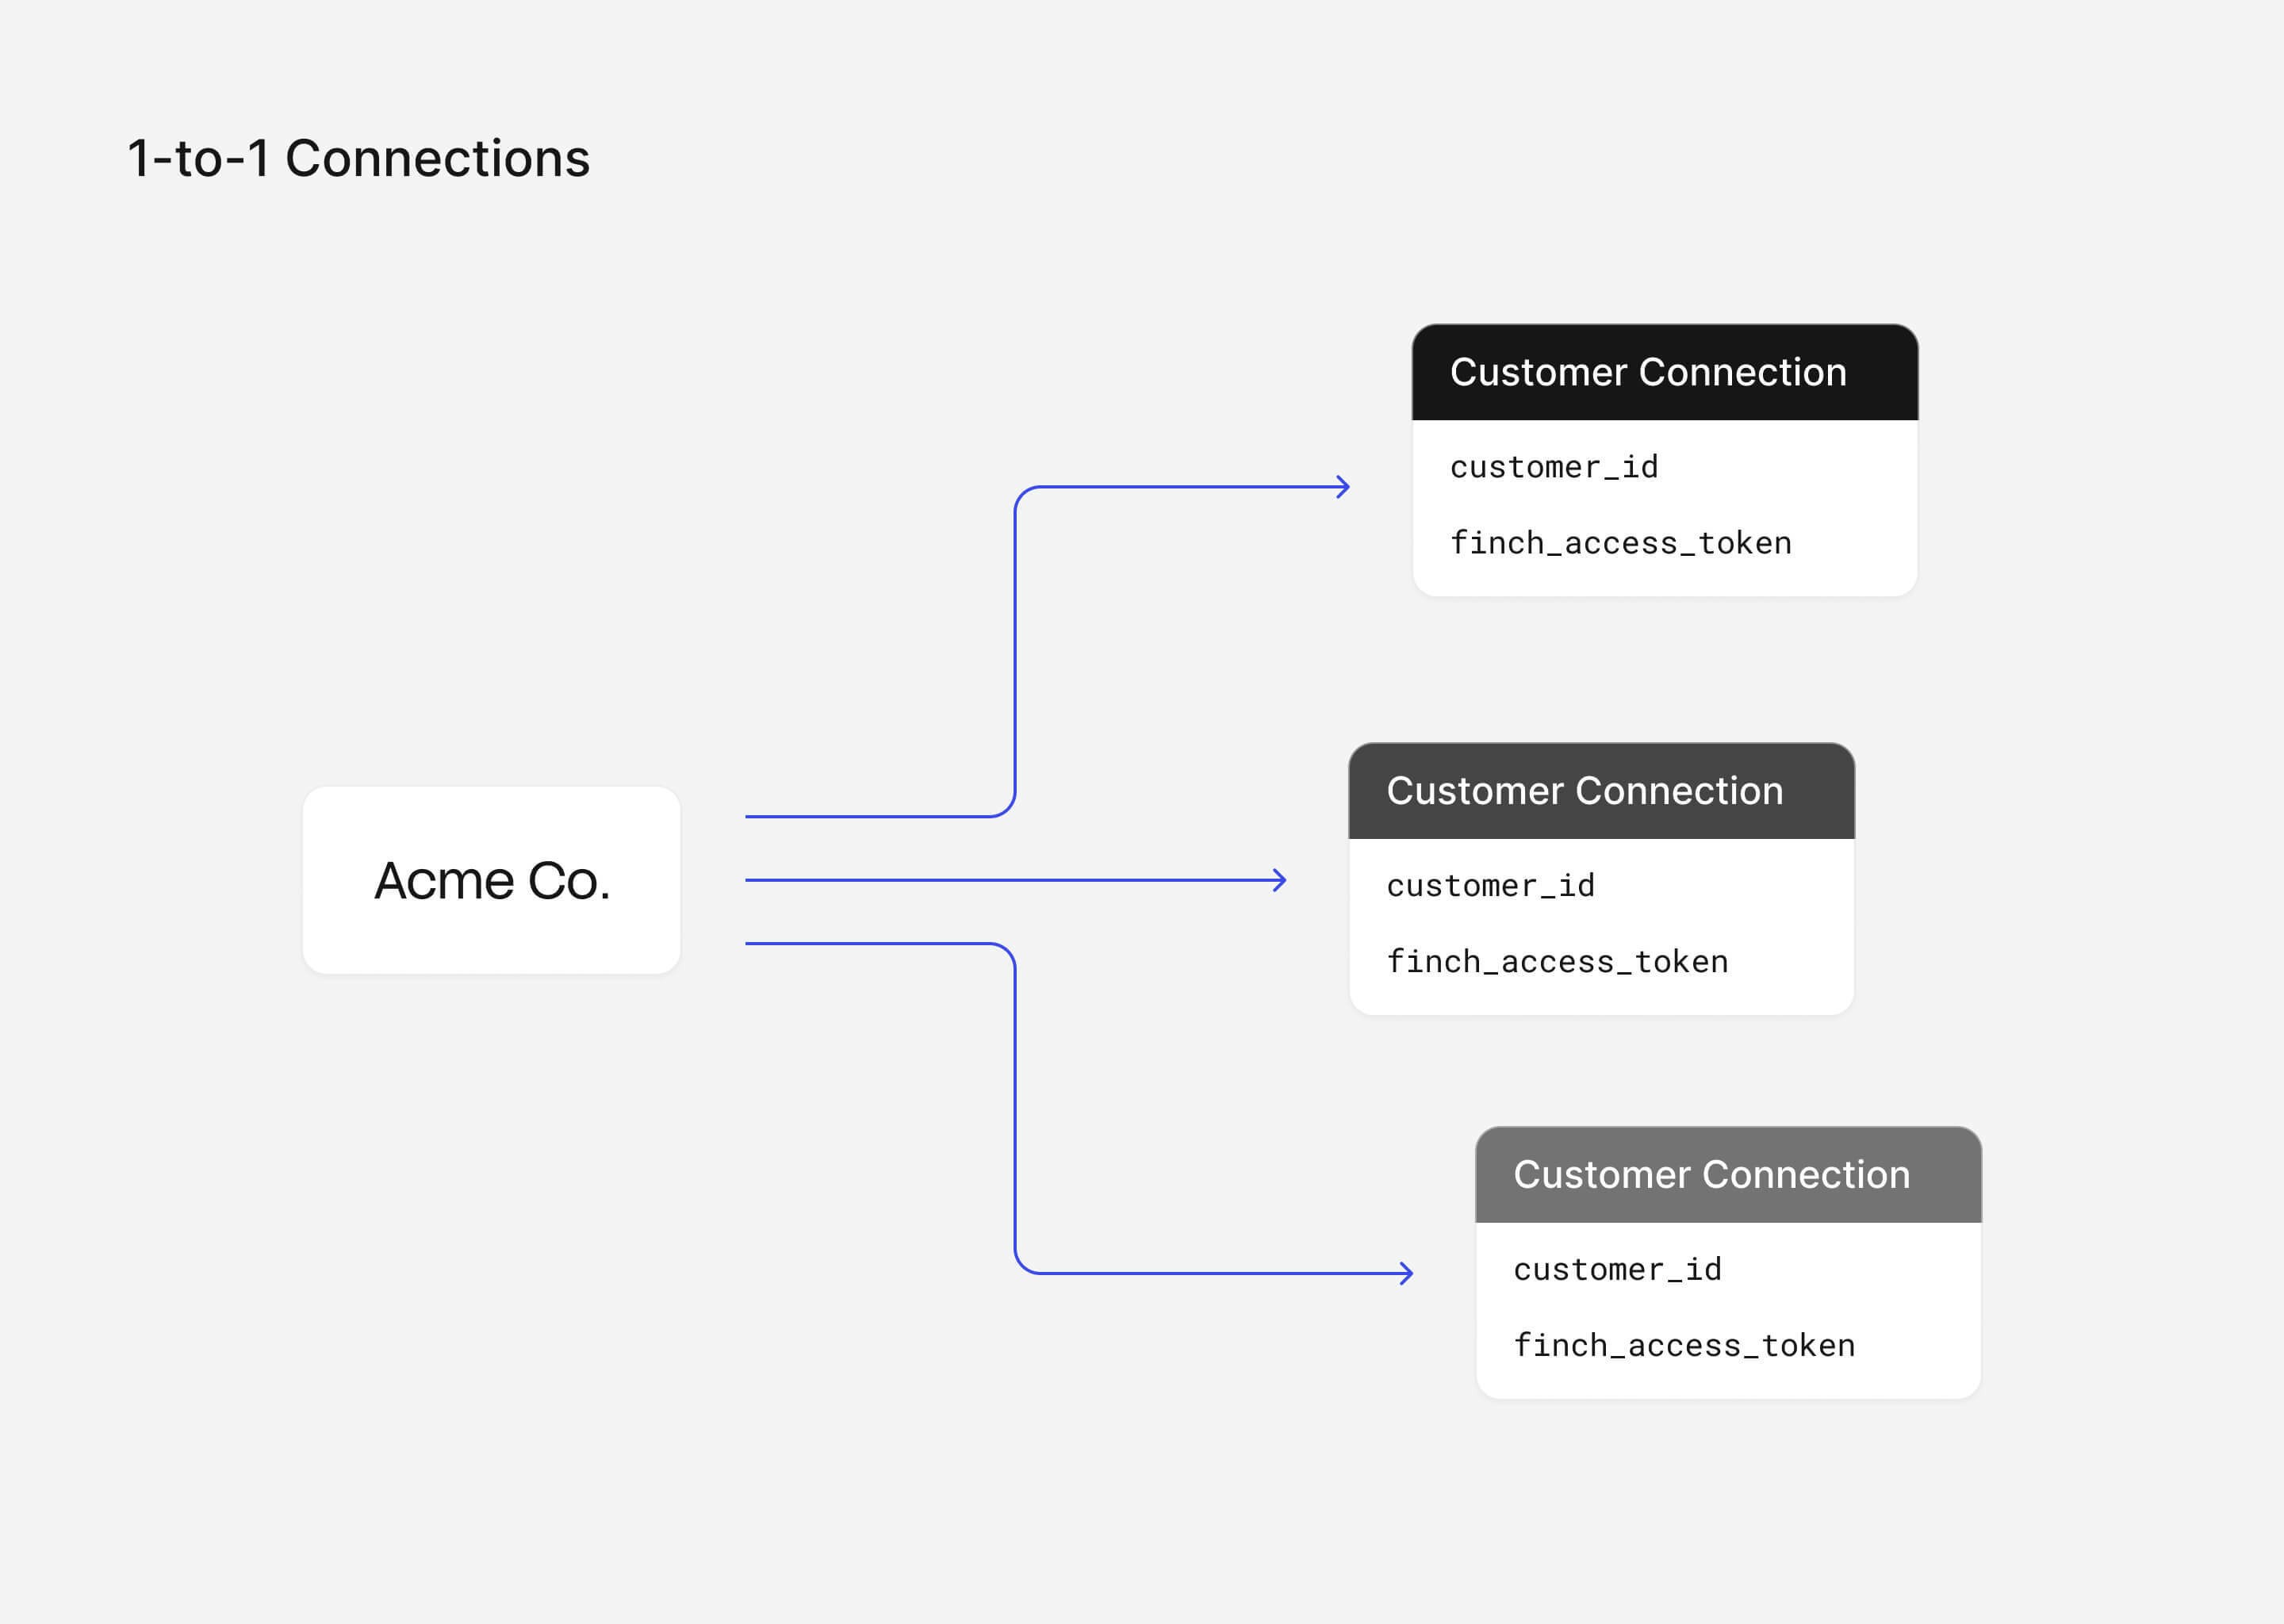
A simple example is a `1:1` connection association. It can be represented by a single database table with columns for `customer_id` and the associated `access_token`. You can use a unique constraint on the `customer_id` column to ensure that each user can have only one associated `access_token`.
 However, in production, you will want to handle the more [complex connection scenarios](#define-connections) above which have a `1:Many` relationship.
This can be represented by two database tables: the *Customers* table one stores the `customer_id` and the *Connections* table stores the `connection_id` which references back to a `customer_id`.
However, in production, you will want to handle the more [complex connection scenarios](#define-connections) above which have a `1:Many` relationship.
This can be represented by two database tables: the *Customers* table one stores the `customer_id` and the *Connections* table stores the `connection_id` which references back to a `customer_id`.
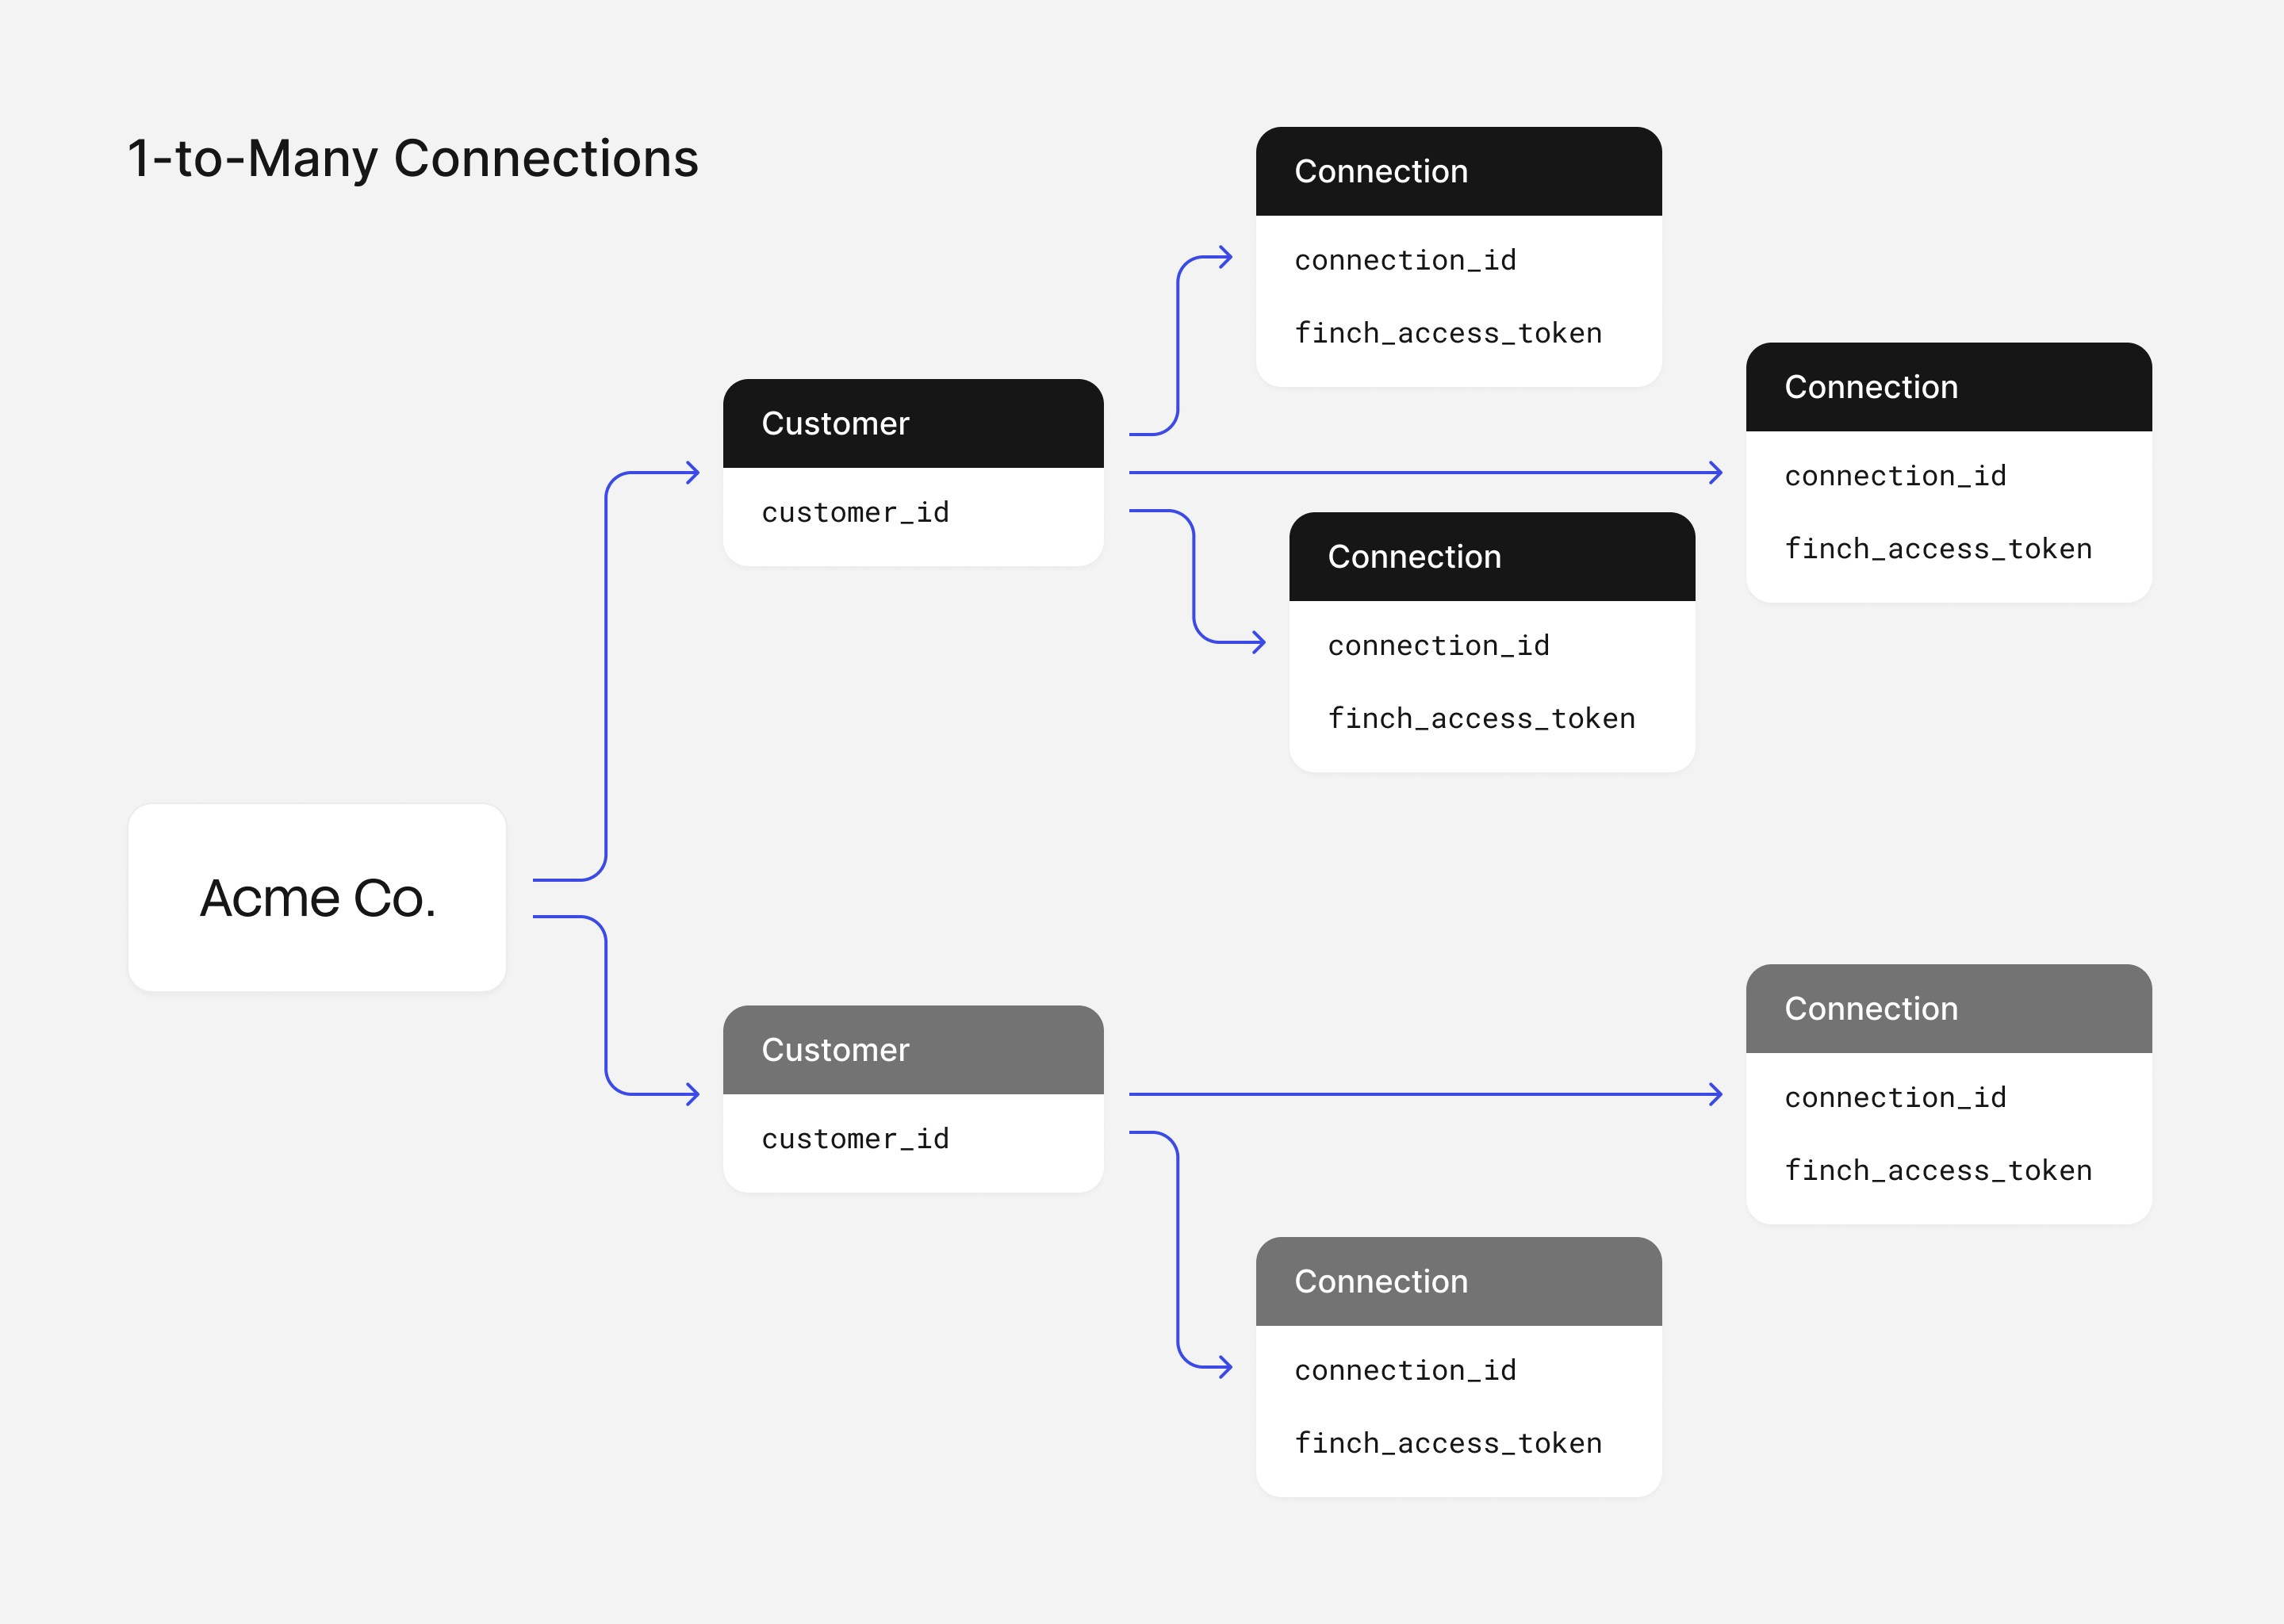 In this realistic example:
* `connection_id` represents the unique finch variables that define a connection.
* A “composite unique constraint” can be set on `connection_id` values which means that while each of these connections can contain the same values individually, the combination of these values must be unique (hence a unique connection).
Now, when you insert data into the *Connections* table, you'll need to ensure that the `connection_id` is unique for each row, while the `access_token` inherently remains unique for each row as well. The `connection_id` (when combined with data from the Finch [/company](/api-reference/organization/company) endpoint) is going to be able to tell you which employers are attached to each customer.
## Enabling multiple connections with Finch Connect
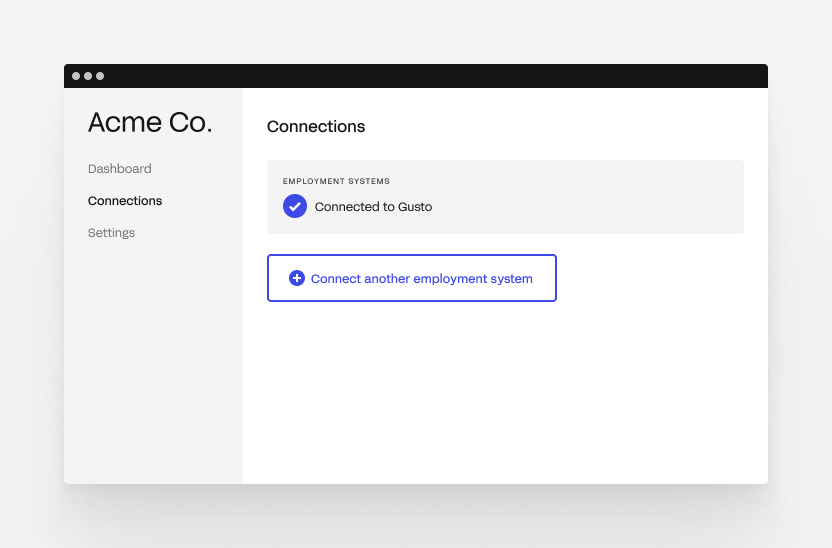
To have your customer create multiple connections in your application, your "onboarding" flow or "connections" page must allow them to go through [Finch Connect](/implementation-guide/Connect/Set-Up-Finch-Connect) multiple times.
Below is an example User Interface. You can present your customers with a page showing all of their current connections and provide the option to connect more accounts, providers, or company entities.
In this realistic example:
* `connection_id` represents the unique finch variables that define a connection.
* A “composite unique constraint” can be set on `connection_id` values which means that while each of these connections can contain the same values individually, the combination of these values must be unique (hence a unique connection).
Now, when you insert data into the *Connections* table, you'll need to ensure that the `connection_id` is unique for each row, while the `access_token` inherently remains unique for each row as well. The `connection_id` (when combined with data from the Finch [/company](/api-reference/organization/company) endpoint) is going to be able to tell you which employers are attached to each customer.
## Enabling multiple connections with Finch Connect
To have your customer create multiple connections in your application, your "onboarding" flow or "connections" page must allow them to go through [Finch Connect](/implementation-guide/Connect/Set-Up-Finch-Connect) multiple times.
Below is an example User Interface. You can present your customers with a page showing all of their current connections and provide the option to connect more accounts, providers, or company entities.
 ## Edge cases
### Reauthentication
In [reauthentication](/developer-resources/Reauthentication) situations, your customer should be prompted to reconnect their provider again before continuing to use the application. When the Finch Connect flow is completed, a new access token will be generated. Simply replace the old token with the new token and start making Finch API requests with the updated token like before.
### Repeating employees
In the [multi-provider or multi-company](#define-connections) scenarios, if your application is combining data across multiple access tokens, you may need to [reconcile employees](/developer-resources/Reconcile-Employees) between responses in order to merge employee data properly.
***
## Checkpoint + Next Step
After completing this step, you should know how to associate access tokens with multiple accounts for each new connection. With proper connection organization, you are ready to use the access token to [make API requests](/implementation-guide/API-Calls/Read-Data) to Finch's various endpoints.
## Learn more
* [Control User Access](/implementation-guide/Backend-Application/Control-Access)
* [Set Up Finch Connect](/implementation-guide/Connect/Set-Up-Finch-Connect)
* [Reauthenticating Connections](/developer-resources/Reauthentication)
* [Reconcile Employees](/developer-resources/Reconcile-Employees)
* [Integration Types: Automated](/integrations/integration-types#automated)
## Edge cases
### Reauthentication
In [reauthentication](/developer-resources/Reauthentication) situations, your customer should be prompted to reconnect their provider again before continuing to use the application. When the Finch Connect flow is completed, a new access token will be generated. Simply replace the old token with the new token and start making Finch API requests with the updated token like before.
### Repeating employees
In the [multi-provider or multi-company](#define-connections) scenarios, if your application is combining data across multiple access tokens, you may need to [reconcile employees](/developer-resources/Reconcile-Employees) between responses in order to merge employee data properly.
***
## Checkpoint + Next Step
After completing this step, you should know how to associate access tokens with multiple accounts for each new connection. With proper connection organization, you are ready to use the access token to [make API requests](/implementation-guide/API-Calls/Read-Data) to Finch's various endpoints.
## Learn more
* [Control User Access](/implementation-guide/Backend-Application/Control-Access)
* [Set Up Finch Connect](/implementation-guide/Connect/Set-Up-Finch-Connect)
* [Reauthenticating Connections](/developer-resources/Reauthentication)
* [Reconcile Employees](/developer-resources/Reconcile-Employees)
* [Integration Types: Automated](/integrations/integration-types#automated)