Workday API
Learn how to authenticate with Workday API via Finch Connect.
In order to connect to Workday you will need to create an Integration System User with the correct permissions and provide the login information to Finch.
Step by step guide
-
Create an Integration System User in Workday
- Log in to your Workday portal
- In the search bar at the top of the page, search for “Create Integration System User”
- Select the “Create Integration System User” task
- Enter a username and password of your choosing for the new Integration System User. Save this information as it will be required throughout the connection process.
Make sure the password does not contain any of the following characters:“&”, “<”, “>”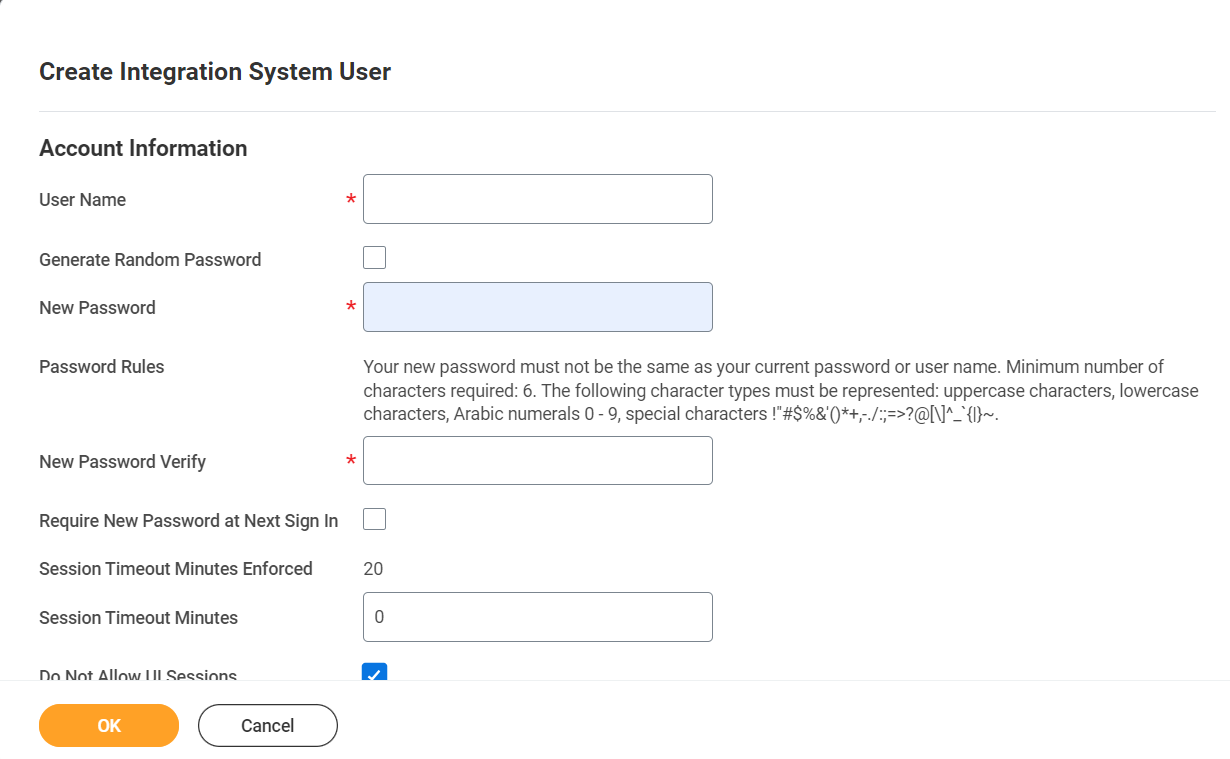
- Ensure that “Require New Password at Next Sign In” is not checked
- Set “Session Timeout Minutes” to 0
- Ensure that “Do Not Allow UI Sessions” is checked
- Click “OK” to create the Integration System User
-
Configure a Security Group
- In the search bar at the top of the page, search for “Create Security Group”
- Select the “Create Security Group” task
- On the “Create Security Group” page, from the “Type of Tenanted Security Group” dropdown, select “Integration System Security Group (Unconstrained)”
- Enter a name for the security group in the “Name” field
- Click “OK” to create the security group
- On the “Edit Integration System Security Group (Unconstrained)” page enter the name of the Integration System User you created in the “Integration System Users” field
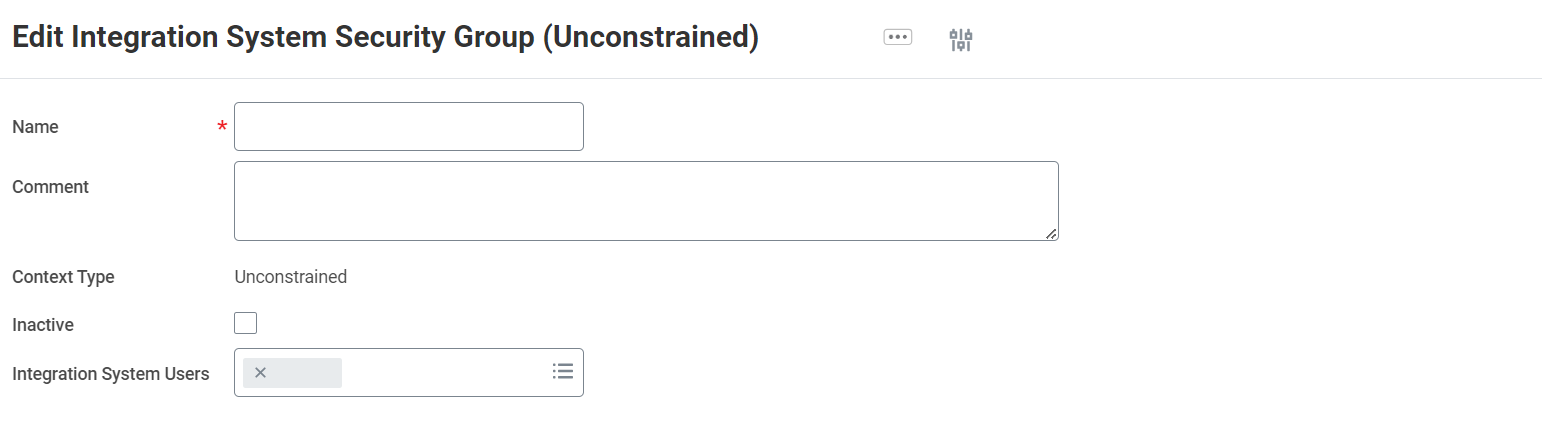
- Click “OK” to assign the Integration System User to the security group
-
Configure the Domain Security Policy Permissions
- In the search bar at the top of the page, search for “Maintain Permissions for Security Group”
- Select the “Maintain Permissions for Security Group” task
- Make sure the “Operation” is “Maintain”, and the “Source Security Group” is the security group you created
- Configure the Domain Security Policy Permissions based on the requirements of the Workday integration you are connection and the information below
Required Domain Security Policies
The following Domain Security Policies are the minimum set that are required in order to connect via Finch:View/Modify Access Domain Security Policy Notes Get Only Set Up: Company General Required for authentication Get Only Worker Data: Public Worker Reports Required to fetch basic employee data that is typically made publicly accessible by other employees Get Only Worker Data: Current Staffing Information Required to fetch basic employee job role data Optional Domain Security Policies
The following Domain Security Policies enable Finch to retrieve additional data, if required:View/Modify Access Domain Security Policy Notes Get Only Worker Data: Compensation by Organization Enables fetching employee compensation info on the /employmentendpointGet Only Person Data: ID Information Enables fetching employee social security numbers (SSN) on the /individualendpointGet Only Person Data: Date of Birth Enables fetching employee date of birth (DOB) on the /individualendpointGet Only Person Data: Gender Enables fetching employee gender on the /individualendpointGet Only Person Data: Ethnicity Enables fetching employee ethnicity on the /individualendpoint -
Activate Security Policy Changes
- In the search bar at the top of the page, search for “Activate Pending Security Policy Changes”
- Select the “Activate Pending Security Policy Changes” task
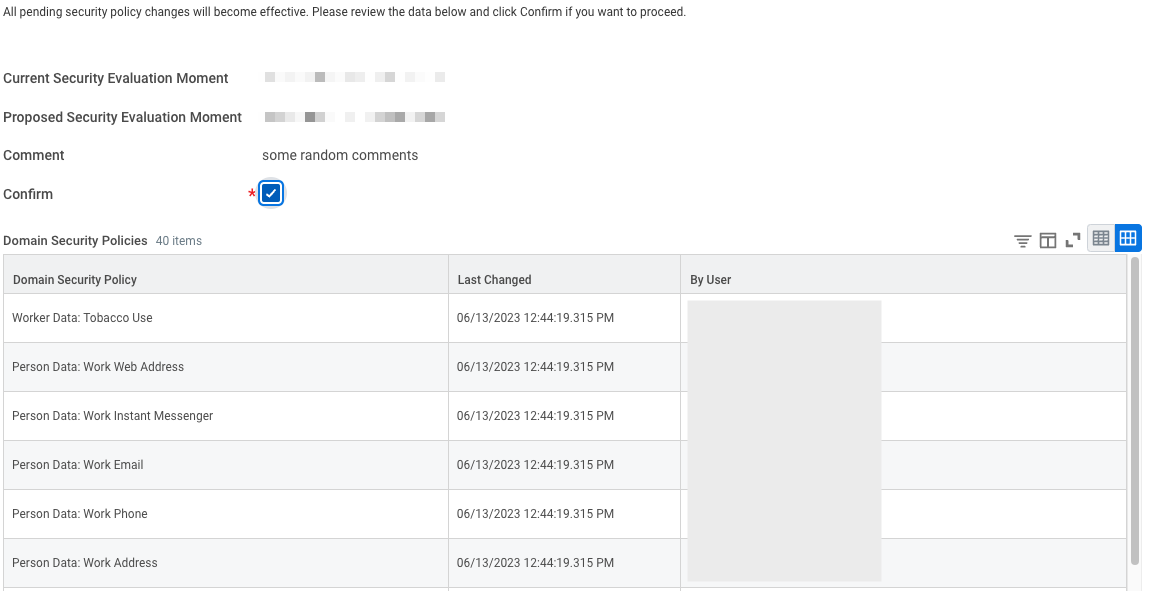
- View the summary of changes waiting to be approved and check the “Confirm” checkbox
-
Configure Authentication Policy
- In the search bar at the top of the page, search for “Manage Authentication Policies”
- Select the “Manage Authentication Policies” report
- Verify that the Security Group is assigned to a policy that has an “Allowed Authentication Type” of “User Name Password” or “Any”.
If this is not the case you must edit the relevant Authentication Policy to add a rule using the steps below:- Edit the Authentication Policy for the environment you want Finch to retrieve data from
- Add a new Authentication Rule for the policy
- Set the “Authentication Rule Name” to a unique value to identify the rule
- Set the “Security Group” to the Security Group you created
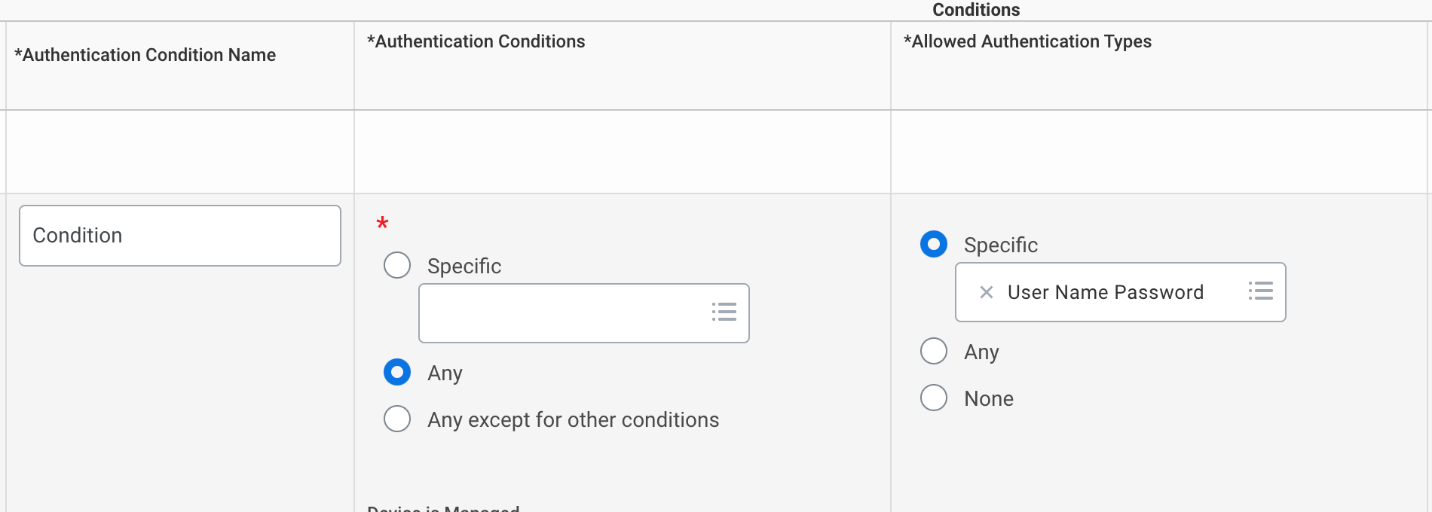
- Set the “Authentication Conditions” to “Any” and the “Allowed Authentication Types” to “Specific > User Name Password”


-
Activate Authentication Policy Changes
- In the search bar at the top of the page, search for “Activate Pending Authentication Policy Changes”
- Select the “Activate Pending Authentication Policy Changes” task
- View the summary of changes waiting to be approved and check the “Confirm” checkbox

-
Obtain the Web Services Endpoint URL
- In the search bar at the top of the page, search for “Public Web Services”
- Select the “Public Web Services” report
- Find the “Human Resources (Public)” item in the “Web Service” column and hover over it so you can click the “…” menu that appears
- In the “…” menu click “Web Service > View WSDL”
- A new page will open containing the technical specifications for the Workday Human Resources Web Service
- Scroll all the way to the bottom of the page and locate the line containing
soapbind:address location=- You can also search within the page using Ctrl+F or Cmd+F for the text
soapbind:address location=
- You can also search within the page using Ctrl+F or Cmd+F for the text
- Copy the URL up until
/serviceThe resulting URL should look something likehttps://wd5-services1.myworkday.com/ccx
- Save this URL to provide to Finch
-
Connect Using Finch Connect
- Paste the username and password for the Integration System User into the “Username” and “Password” fields
- Paste your Workday tenant ID into the “Tenant ID” field. You can find this value in the URL of your web browser when on the Workday home page:
- If the URL looks like
https://impl.workday.com/somecompanythen your tenant ID issomecompany - If the URL looks like
https://somecompany.workday.comthen your tenant ID issomecompany
- If the URL looks like
- Paste the Web Services Endpoint URL you copied earlier into the “API Base URL” field
- Click “Connect”
-
Select a Company to Connect
Finch Connect will ask you to select which company you’d like to connect. This is a list of companies retrieved from your Workday system that employees area assigned to.
The company you connect will be the only company Finch will retrieve data for. If you have other companies you also want to connect you will have to repeat the “Connect Using Finch Connect” section for each one.
Was this page helpful?