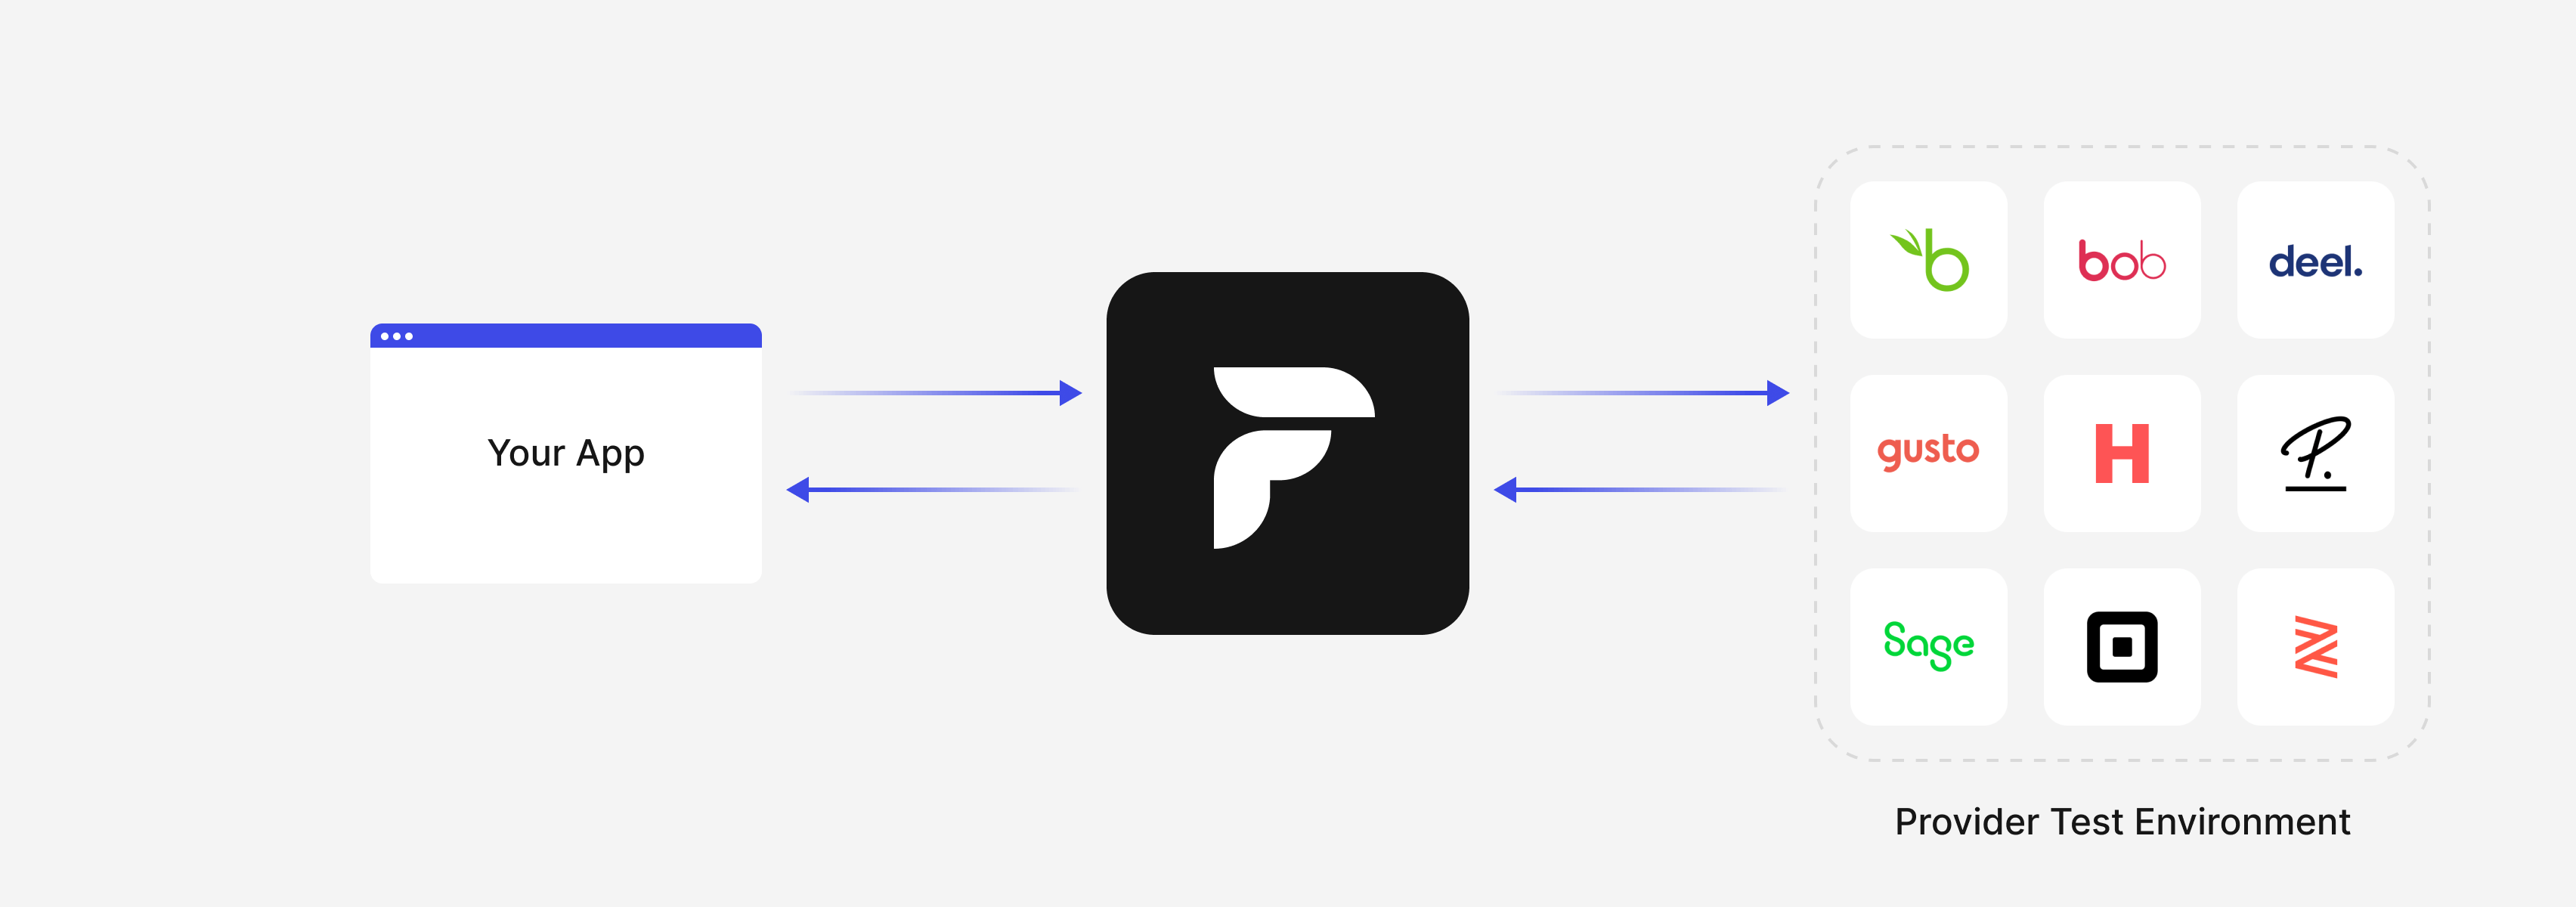
A note on provider coverage: You don’t need to test against every provider in Finch’s network. Finch normalizes data across all providers into a consistent schema, so your application code doesn’t change based on which provider an employer uses. Use the Field Support matrix to understand which fields are supported for the providers most relevant to your use case.Documentation Index
Fetch the complete documentation index at: https://developer.tryfinch.com/llms.txt
Use this file to discover all available pages before exploring further.
1. Choose your testing environment
Finch offers two sandbox options depending on what you’re validating: Finch Sandbox — generate synthetic employment data programmatically. Use this for automated, repeatable tests across any scenario, including providers that don’t offer their own test environment.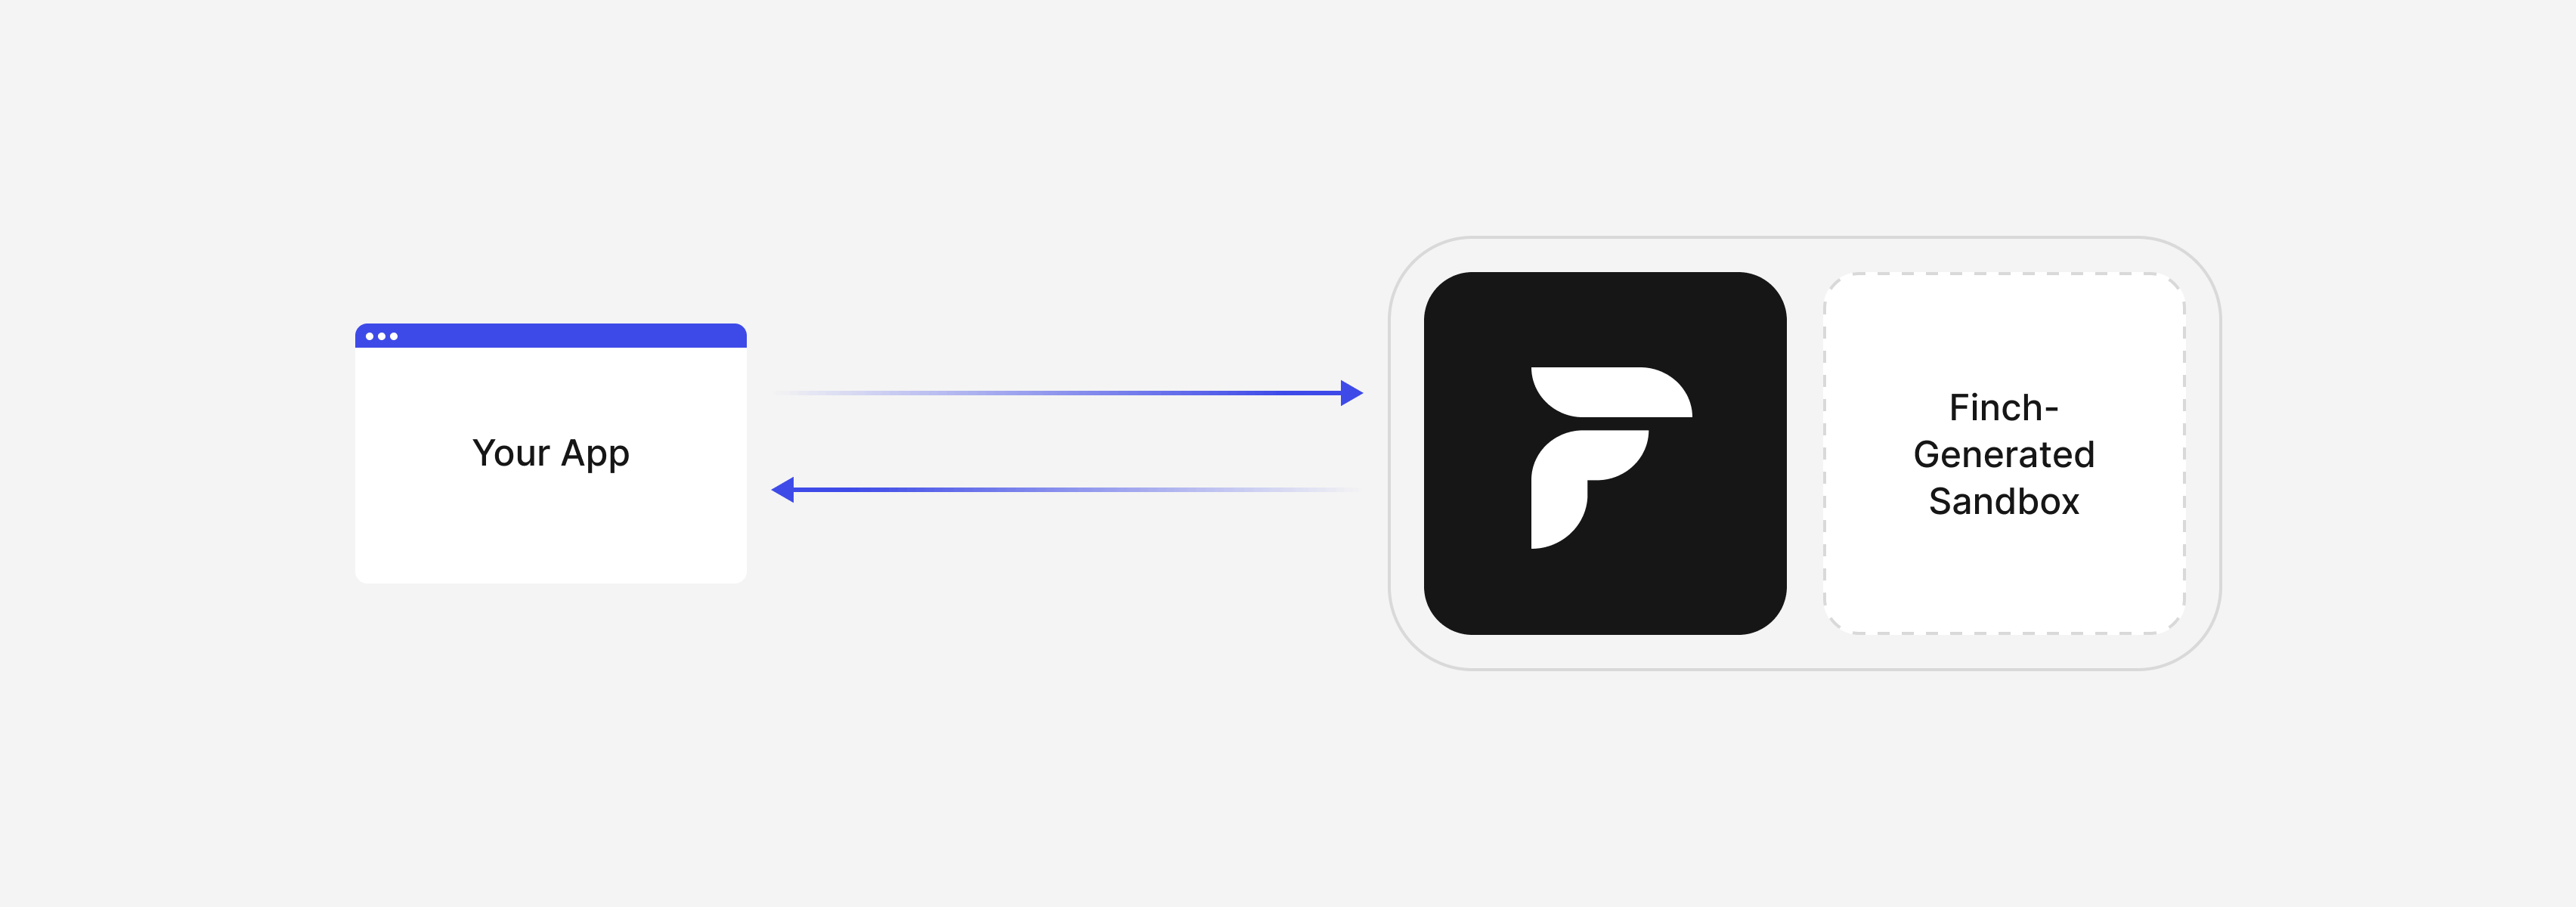
| Features | Finch Sandbox | Provider Sandbox | Production |
|---|---|---|---|
| Free | ✓ | ✓ | - |
| Allowed connections | 100 | 5 | Unlimited |
| Allowed accounts per connection | 3 | 3 | Unlimited |
| Connect to real providers | - | ✓ | ✓ |
| Scheduled Data Syncs | - (?) | ✓ | ✓ |
| Assisted Connect | ✓ | - | ✓ |
| Webhooks *N/A for Starter plans | ✓ | ✓ | ✓ |
| Integration configuration | - | - | ✓ |
| Activity Logs | ✓ | ✓ | ✓ |
| Request Forwarding | - | ✓ | ✓ |
You’ll need a Sandbox application to initiate sandbox connections. A free sandbox environment is included with the Finch Developer Dashboard account. If someone on your team has already created one, ask them to add you. If your organization does not have one, please sign up or reach out to us.
2. Test your Finch Connect flow
Key scenarios to validate:- Successful connection — does your app correctly receive and store the authorization code and exchange it for an access token?
- Failed connection — how does your app behave when a user enters invalid credentials or closes Connect without completing the flow?
- Reauthentication — when an employer reauthenticates an existing connection, confirm your system stores and uses the new access_token.
3. Test against Finch-specific data scenarios
Finch normalizes data across dozens of providers — which means your application needs to handle variability gracefully. Build test cases around:- null field values — Finch always returns the fields defined in our schema, but values may be null for some providers or if the employer has not updated the values in the provider system. Your app should handle null values without breaking.
- Reauthentication — connections can require reauth when a provider credential expires or changes. How does your app detect and respond to a 401 with REAUTHENTICATE_USER?
- Deductions edge cases — if you’re using the Deductions product, test enrollment submissions and validate that your error handling surfaces the right feedback.
- Rate limits — Finch enforces rate limits per connection. Test that your request patterns stay within bounds and that your app handles 429 responses correctly.
Postman Collection
The Finch API Postman collection provides a ready-to-use set of API requests for testing and exploring the Finch API. Import the collection into Postman to quickly test endpoints, validate requests and responses, and experiment with different API scenarios. The collection includes pre-configured requests for all Finch API endpoints across Organization, Payroll, Deductions, Documents, and Management products, along with environment variables to easily switch between sandbox and production environments.Postman Collection
5. Log Finch-Request-Id on every request
Every Finch API response includes a Finch-Request-Id header. Log this for all requests — successful and failed. When you open a support ticket, this ID is the fastest way for Finch to diagnose what happened.Checkpoint + Next Step
At this point you should have a testing plan that covers your Connect flow, API response handling, and writes if applicable. The next pages in this section walk through how to use the Finch Sandbox including how to create automated tests for employment scenarios and how to test assisted and write deductions flows.