Authentication Methods
Finch offers 4 ways for employers to authenticate through Finch Connect: OAuth, Credentials, API Token, or Assisted. Authentication method will vary by provider, and will impact the fields and functionality available to you. Find field support for each provider by authentication method here.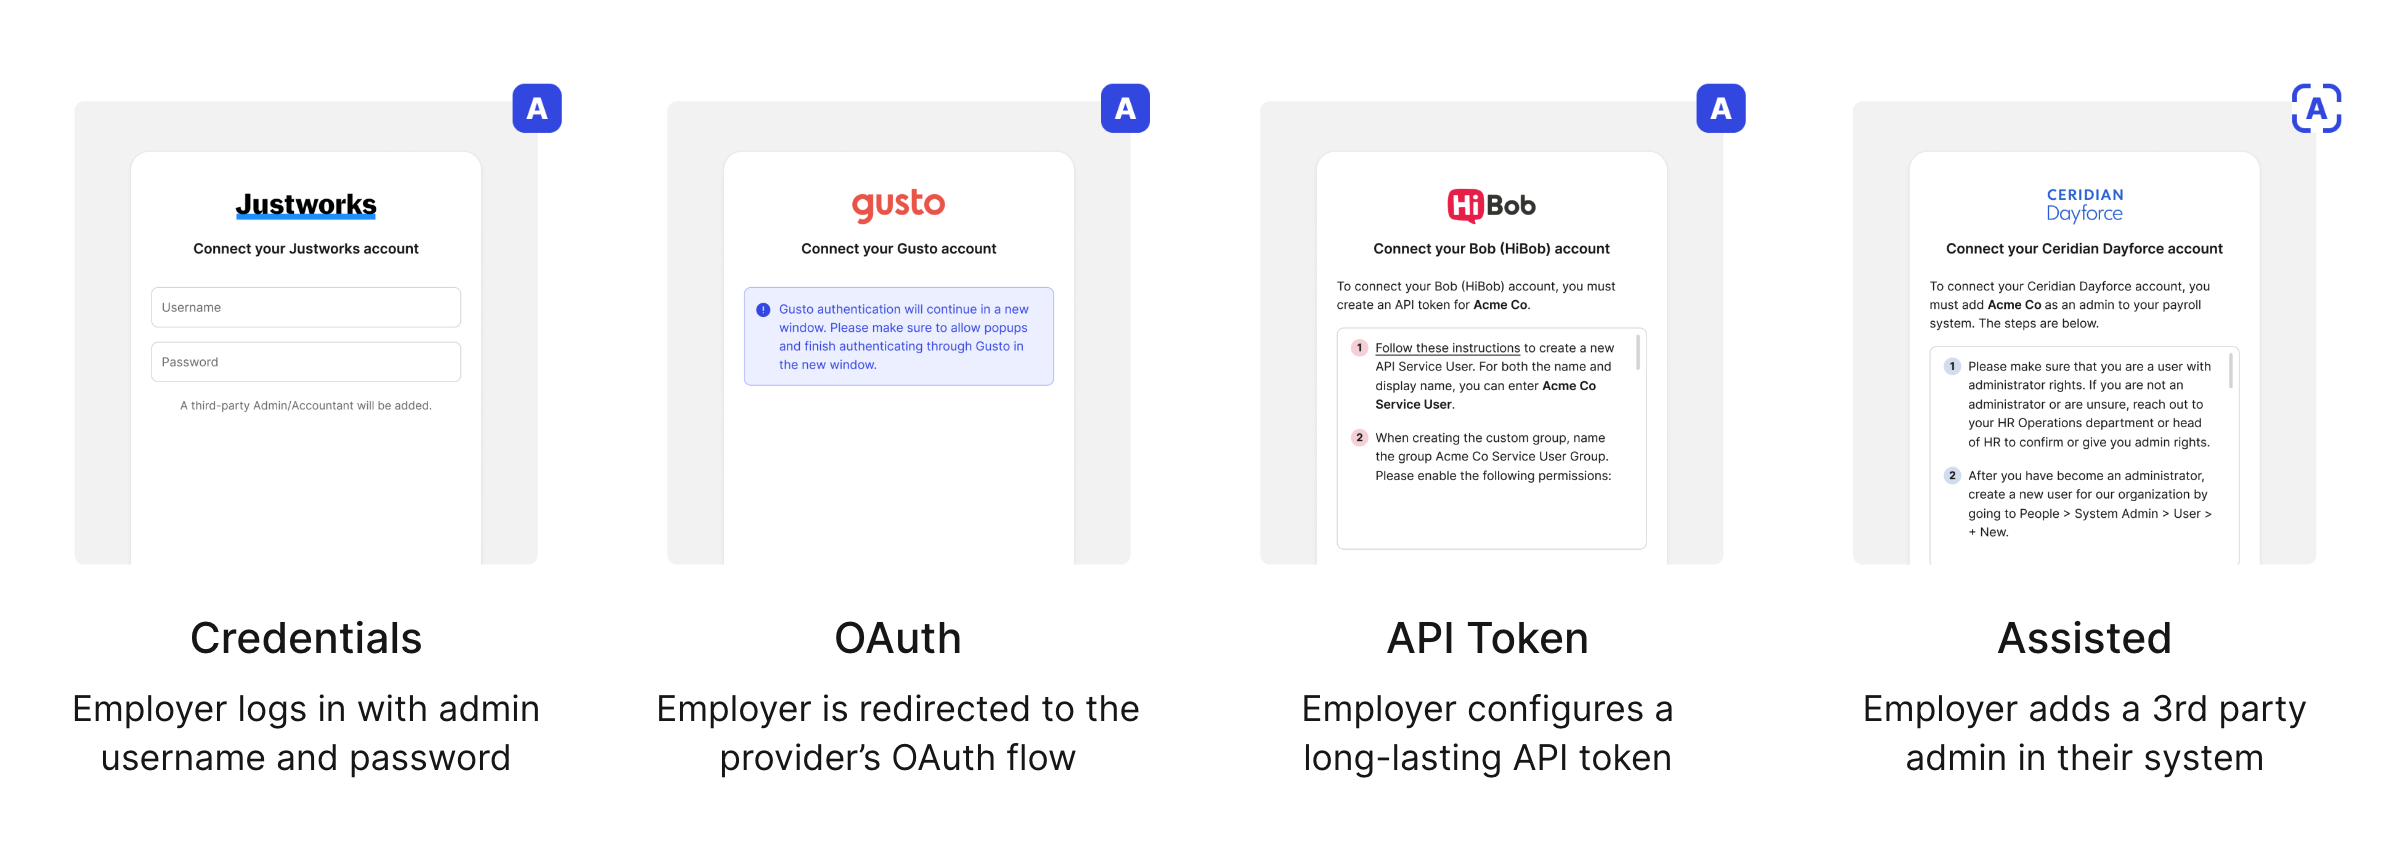
OAuth
OAuth allows access tokens to be securely issued to Finch via the provider’s own authorization flow. This is the preferred authentication method for all parties. Finch is constantly working to increase the number of providers supported through OAuth, which offers superior speed and survivability. However, OAuth support is heavily dependent on the underlying provider.Credentials
The credentials method enables employers to simply log in with an administrator username and password to set up a connection. It’s a very low friction option for employers to connect their provider through Finch. When possible, Finch will automatically set up a separate third-party administrator or accountant user behind the scenes to keep this connection active indefinitely. This will be noted on the credentials log in screen. If for some reason an employer is unable to log in with credentials after 3 attempts, they can still establish a connection through Authentication Fallback.API Token
The API token method leverages API keys supplied by the provider to establish a connection. Once set up, these connections very rarely need re-authentication. Finch will guide employers through each step required to obtain an API key from their provider. See our authentication guides for details. In a few cases, employers will be charged for access to their API token. If you have a Help Center login, you can see the (short) list of providers that charge employer fees here.Assisted
Assisted is an authentication method available to customers using Finch Assist. In this method, Finch asks employers to create a new admin or accountant user in their system. Finch’s operations team then uses that connection to refresh data every 7 days. Re-authentication will only be required if the user is removed or loses the necessary permissions.Set Up Preferred Authentication Methods Per Provider
While authentication method will often come down to which fields or functionality is needed, you have the flexibility to decide which to make available for your end customers and their order of priority. You can set primary and secondary authentication methods for each provider, and even hide specific methods if desired. All of this is possible through the Finch Dashboard. For example, if you want to present only the API token method to Bob customers, Finch can conceal the credentials-based authentication method in Finch Connect.
Enable or Disable Authentication Methods Globally
You can also disable an authentication method globally using the Settings page in the Dashboard. These settings will apply automatically to any new integrations.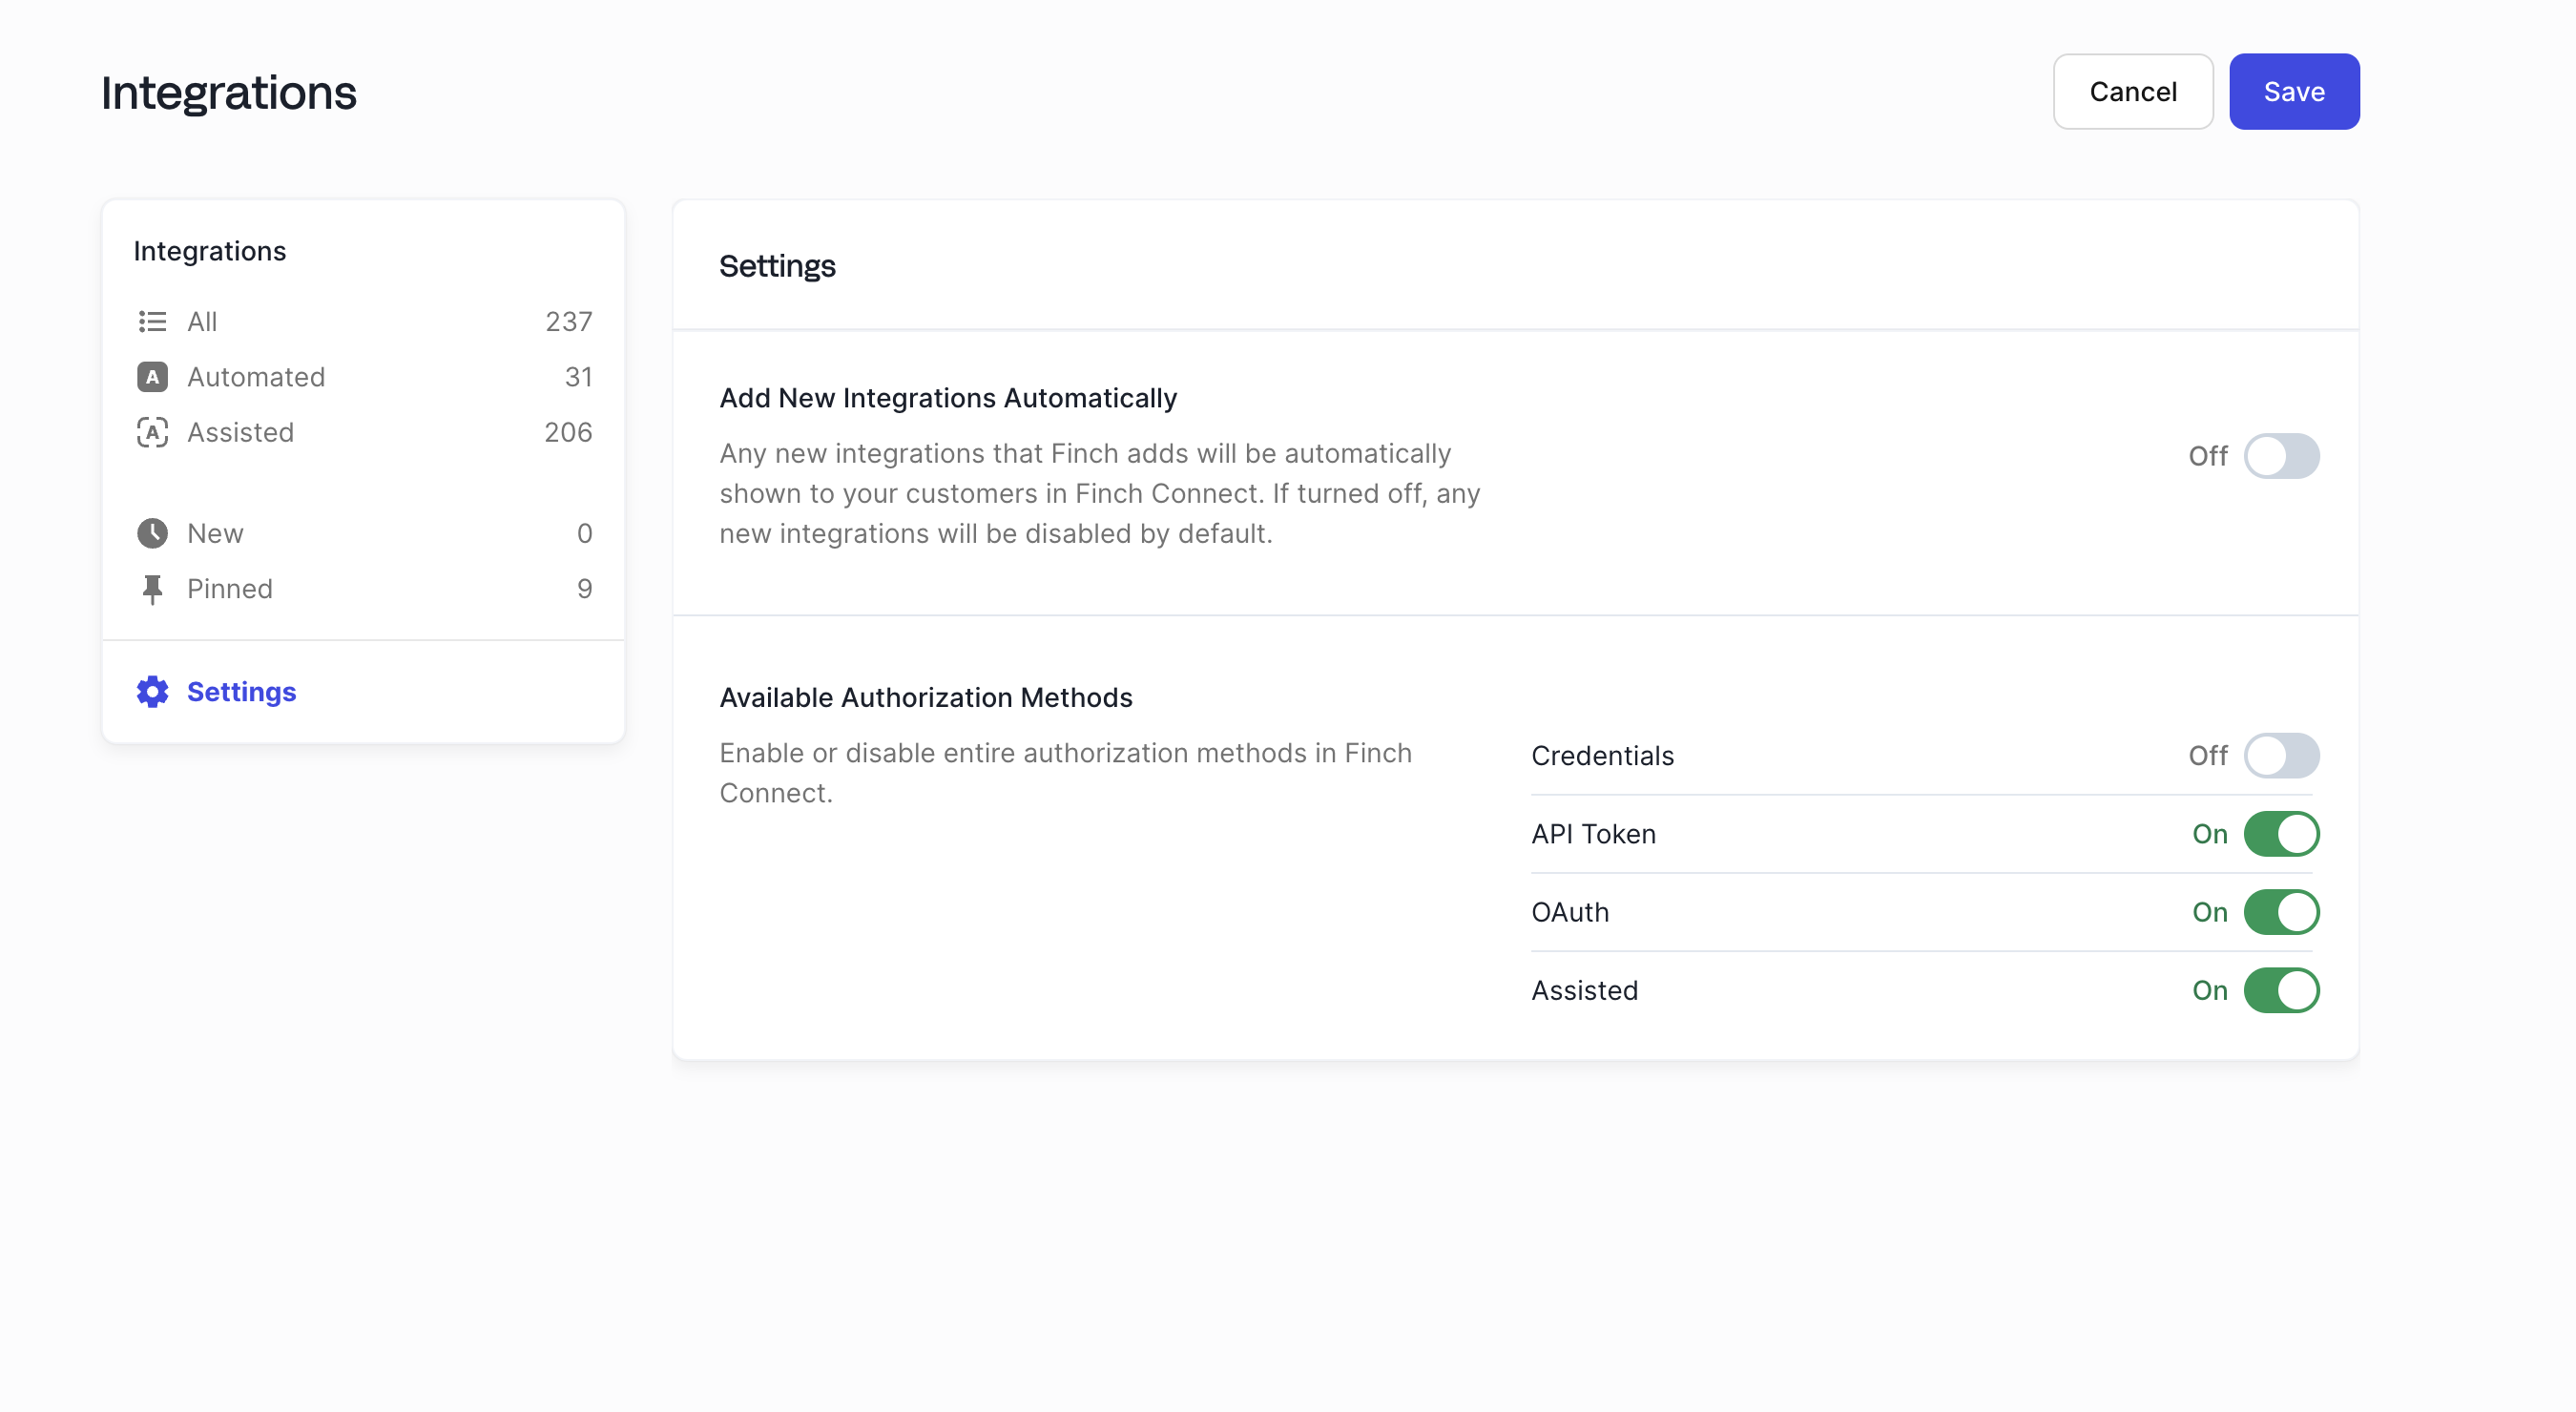
Set Up Authentication Fallback
Authentication Fallback enables employers to authorize through Finch Connect even when Finch is experiencing intermittent issues with a provider. Please note Email Forwarding is a prerequisite for Authentication Fallback. Please refer to this Help Center article for recommendations on how to best manage connections created through Authentication Fallback.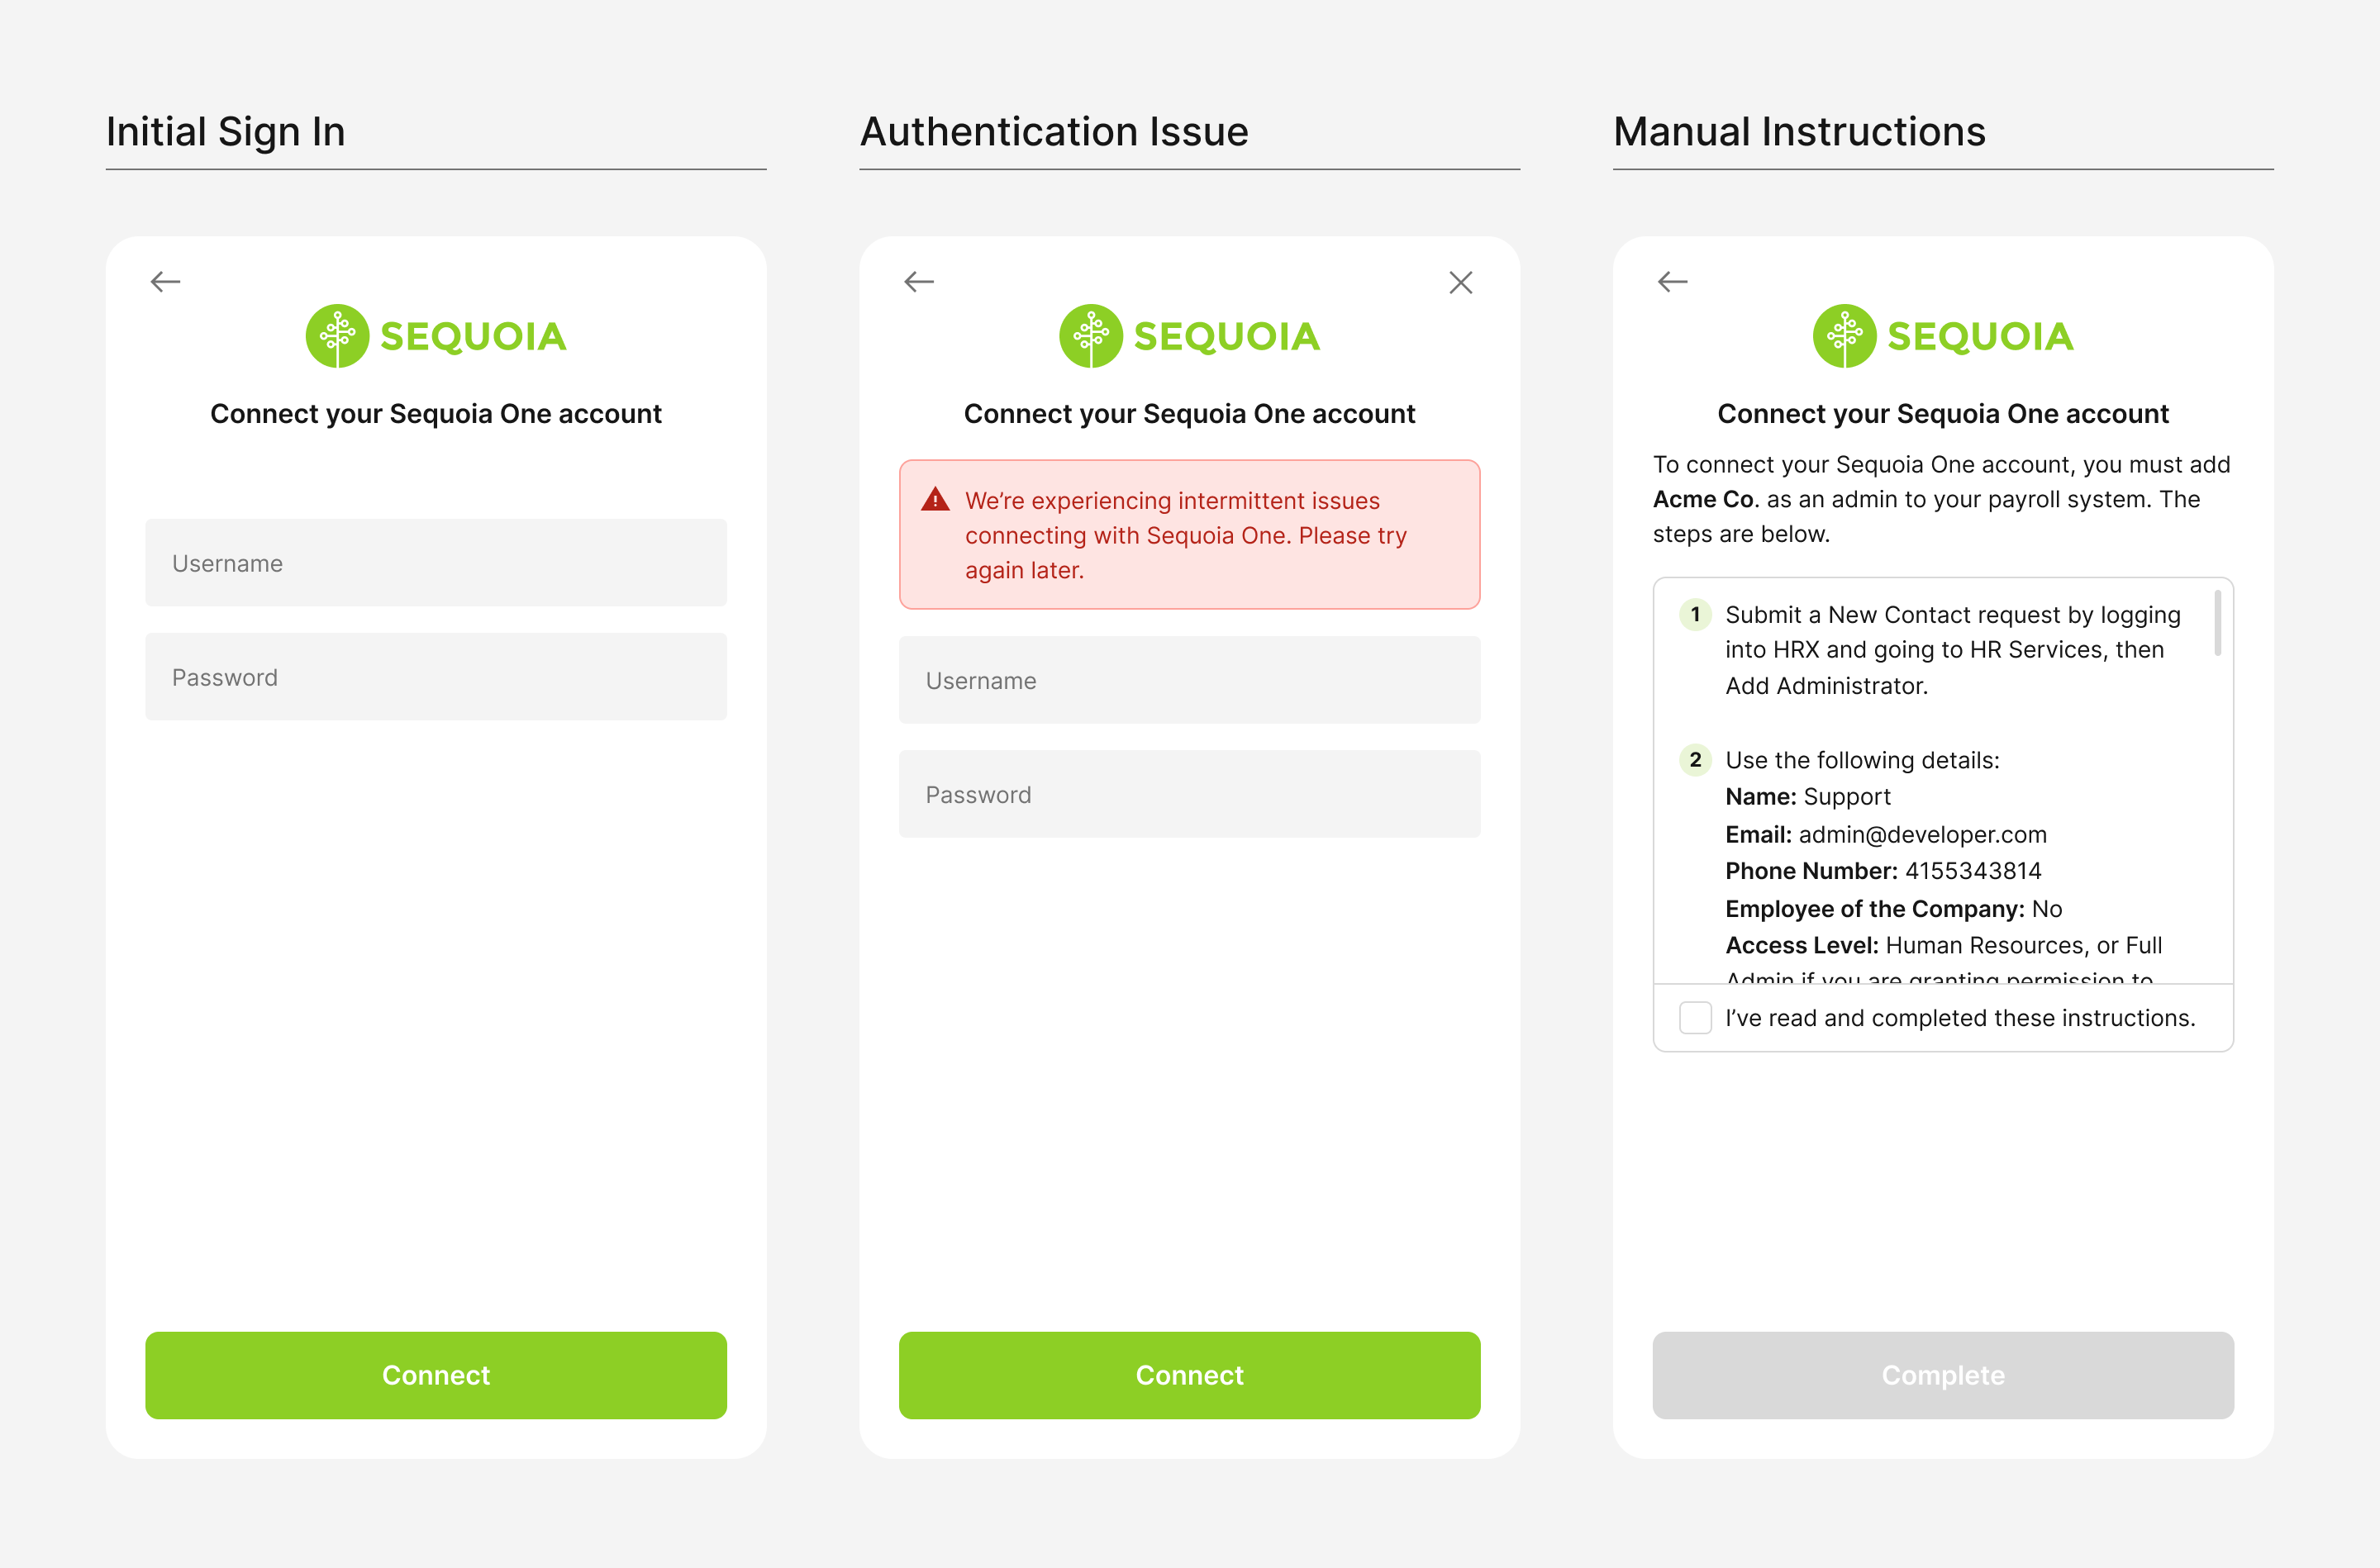
- ADP Workforce Now
- ADP Run
- Quickbooks
- Paychex
- Paycom
- Sequoia One
- Square Payroll
Manage Re-Authentication
Finch aims to maintain connections as long as possible. However, there are a few situations where connections may be broken. For example, connections may be broken if a user changes security settings or permissions on their account. Or if an underlying provider makes a breaking change to their infrastructure. If this happens, the employer will need to go through Finch Connect again (re-authenticate). Theconnection_id parameter allows the employer to bypass the steps of Finch Connect they’ve already completed when re-authenticating.
Remember this will create a new access_token for your user that will be to be updated. Make sure to save this new token in your database.
Identify connections that require re-authentication
In the API, broken connections will result in an error with the HTTP status code401 and a finch_code of reauthenticate_user.
In the Finch Dashboard, you can view all connections that require re-authentication on the Connections page. If any connections require re-authentication, a banner will appear at the top of the page. Simply click the banner to filter the connections that require action from the employer.
Set up re-auth notifications
To increase conversion, we recommend either using in-app or email notifications to notify your user there is an issue with their connection, why re-connecting is beneficial, and the steps they need to follow to re-connect. To create a more seamless experience and avoid unintended duplicate connections, use theconnection_id parameter. You can find the connection_id of your customer by calling the /introspect endpoint with their access_token.
Below are a couple of options to present the re-connection flow to your users:
- Prompt your user to log on to their application dashboard where you can present them the UI to go through Finch Connect again.
- Send your user an authorization URL with a
redirect_urithat redirects them back to their application dashboard after a successful reconnection. Learn more about redirecting your users to Finch Connect.